Sometimes vsync is not desired when testing WebGL and other animations in Chrome. This is how to launch chrome without vsync in OSX, from the command line.
open -a "Google Chrome" --args --disable-gpu-vsyncHappy coding.
Sometimes vsync is not desired when testing WebGL and other animations in Chrome. This is how to launch chrome without vsync in OSX, from the command line.
open -a "Google Chrome" --args --disable-gpu-vsyncHappy coding.
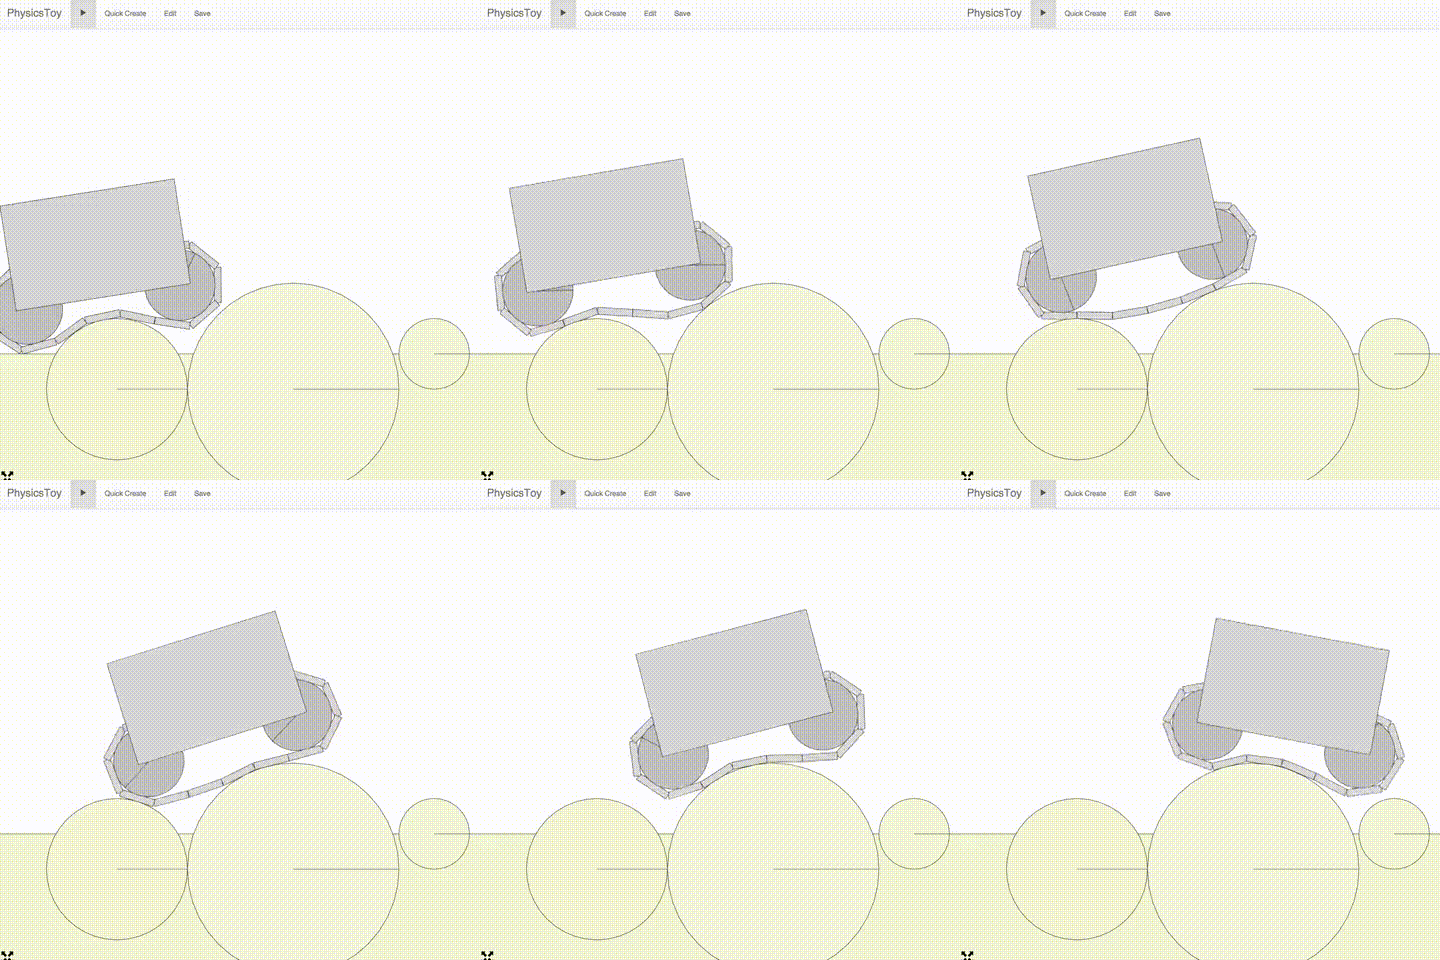
I recently made a demo for the p2.js physics engine with a truck and soft wheels, simulating traction. It’s a pretty interesting case, using a few different p2 constraint types. Perfect for a tutorial.

The first thing we need is the simulation world.
var world = new p2.World({

  gravity : [0,-5]

});
Before starting with the vehicle, let’s set up materials. Experience tells me we’re going to need some extra friction for the wheels to get some traction against the ground. For this purpose, we create two Materials and a ContactMaterial. This way we can define a new friction coefficient between ground and wheels.
var groundMat = new p2.Material();

var wheelMat = new p2.Material();

var contactMat = new p2.ContactMaterial(groundMat, wheelMat, {

  friction: 30

});

world.addContactMaterial(contactMat);
We will use these two materials shortly, when creating geometry.
The chassis is a single rigid body, with a few shapes in it. First, let’s create the Body:
var chassisBody = new p2.Body({

  mass: 1,

  position: [-0.3, 2.2]

});

world.addBody(chassisBody);
Next step is to add some geometry to it.

// Capsule below the chassis

chassisBody.addShape(new p2.Capsule({

  length: 1.8,

  radius: 0.6

}), [0.5,-0.4], -0.1);


// First capsule above the trunk

chassisBody.addShape(new p2.Capsule({

  length: 1.8,

  radius: 0.1

}), [-0.4, 0.6], Math.PI/2);


// Second capsule above the trunk

chassisBody.addShape(new p2.Capsule({

  length: 1.8,

  radius: 0.1

}), [-0.2, 0.6], Math.PI/2);


// Inclined capsule above the trunk

chassisBody.addShape(new p2.Capsule({

  length: 1.8,

  radius: 0.1

}), [-1.4, 1], Math.PI/7);


// Main chassis shape

chassisBody.addShape(new p2.Convex({

  vertices: [

    [3.5, -0.6],

    [3.7, -0.4],

    [3.6, 0.5],

    [3.3, 0.6],

    [-3.5, 0.6],

    [-3.55, -0.1],

    [-3.4, -0.6]

  ],

  width: 7,

  height: 1.2

}));


// Top "window"

chassisBody.addShape(new p2.Convex({

  vertices: [

    [1, -0.5],

    [0.3, 0.5],

    [-1, 0.5],

    [-1.1, -0.5]

  ]

}), [1, 1.1], 0);For the soft wheel simulation, I chose an approach where the center of the wheel is a circular body, and the outer shell consists out of a number of “links”. The links are interconnected in a circle, and they are also constrained to the center circle so they must move when the inner wheel rotates. Finally the links have a spring connection to the center so they can flex radially.

Let’s break this down. First we create the center circle body.
var wheelBody = new p2.Body({

  mass: 1

});

wheelBody.addShape(new p2.Circle({ radius: 0.4 }));

world.addBody(wheelBody);
Let’s add a single link for starters. We use a Capsule shape.
var linkBody = new p2.Body({

  mass: 0.1,

  position: [0, 1],

  angle: Math.PI / 2

});

linkBody.addShape(new p2.Capsule({

  radius: 0.05,

  length: 0.4,

  material: wheelMat

}));

world.addBody(body);
First we need to make sure it can only move radially along an axis from the circle body’s center. For this, we use a PrismaticConstraint. We use the body centers as anchor points and define the slider axis locally in the center body.
var prismatic = new p2.PrismaticConstraint(wheelBody, linkBody, {

  localAnchorA:  [0, 0],

  localAnchorB:  [0, 0],

  localAxisA: [0, 1],

  disableRotationalLock: true,

  collideConnected: true

});

world.addConstraint(prismatic);
To keep the links in a circle when the wheel is at rest, we add a DistanceConstraint between the center body and the link. To make the constraint soft, we set a small maxForce.
var distanceConstraint = new p2.DistanceConstraint(wheelBody, linkBody, {

  maxForce: 4

});

world.addConstraint(distanceConstraint);
Now we will modify the “link” code so it runs in a for loop and adds more links. We will also make sure the loop adds RevoluteConstraints to connect the link ends to each other in a circular formation around the center body.

// Create a chain of capsules around the center.

var lastBody, firstBody, N=16;

var linkLength = Math.sqrt(2 - 2*Math.cos(2 * Math.PI / N));

for(var i=0; i


  // Create a capsule body

  var angle = i / N * Math.PI * 2;

  var x = Math.cos(angle) - 2.2;

  var y = Math.sin(angle);

  var linkBody = new p2.Body({

    mass: 0.1,

    position: [x,y],

    angle: angle + Math.PI / 2

  });

  linkBody.addShape(new p2.Capsule({

    radius: 0.05,

    length: linkLength,

    material: wheelMat

  }));

  world.addBody(linkBody);


  // Constrain the capsule body to the center body.

  // A prismatic constraint lets it move radially from the center body along one axis

  var prismatic = new p2.PrismaticConstraint(wheelBody, linkBody, {

    localAnchorA:  [0, 0],

    localAnchorB:  [0, 0],

    localAxisA: [

      Math.cos(angle),

      Math.sin(angle)

    ],

    disableRotationalLock: true, // Let the capsule rotate around its own axis

    collideConnected: true

  });

  world.addConstraint(prismatic);


  // Make a "spring" that keeps the body from the center body at a given distance with some flexing

  world.addConstraint(new p2.DistanceConstraint(wheelBody, body, {

    maxForce: 4 // Allow flexing

  }));


  if(lastBody){

    // Constrain the capsule to the previous one.

    var c = new p2.RevoluteConstraint(linkBody, lastBody, {

      localPivotA: [-linkLength/2, 0],

      localPivotB: [linkLength/2, 0],

      collideConnected: false

    });

    world.addConstraint(c);

  } else {

    firstBody = linkBody;

  }


  lastBody = linkBody;

}


// Close the capsule circle

world.addConstraint(new p2.RevoluteConstraint(firstBody, lastBody, {

  localPivotA: [-linkLength/2, 0],

  localPivotB: [linkLength/2, 0],

  collideConnected: false

})); Now we will constrain the wheels to the chassis. We will let them move vertically and rotate freely using prismatic constraints. We set limits on the constraints so the wheels don’t slide too far away from (or too close to) the chassis.

var c1 = new p2.PrismaticConstraint(chassisBody,wheelBodyA,{

  localAnchorA : [

    wheelBodyA.position[0] - chassisBody.position[0],

    wheelBodyA.position[1] - chassisBody.position[1]

  ],

  localAnchorB: [0,0],

  localAxisA: [0,1],

  disableRotationalLock: true

});

var c2 = new p2.PrismaticConstraint(chassisBody,wheelBodyB,{

  localAnchorA: [

    wheelBodyB.position[0] - chassisBody.position[0],

    wheelBodyB.position[1] - chassisBody.position[1]

  ],

  localAnchorB: [0,0],

  localAxisA: [0,1],

  disableRotationalLock: true

});

c1.setLimits(-0.5, 0.4);

c2.setLimits(-0.5, 0.4);

world.addConstraint(c1);

world.addConstraint(c2);To get a suspension-like effect, we create soft distance constraints, that will let the wheels move up and down a bit. A distance constraint is by default very stiff, so we set its maxForce to something smaller to make it soft.

var suspensionA = new p2.DistanceConstraint(wheelBodyA, chassisBody, {

  maxForce: 6

});

world.addConstraint(suspensionA);

var suspensionB = new p2.DistanceConstraint(wheelBodyB, chassisBody, {

  maxForce: 6

});

world.addConstraint(suspensionB);At last, we create a ground plane to let the vehicle drive on something. Optionally, we can add some obstacles.
var groundBody = new p2.Body({

  position: [0, -2]

});

groundBody.addShape(new p2.Plane({

  material: groundMat

}));

world.addBody(groundBody);If you want to apply a torque to the wheels to make the vehicle move forward, it should be done after each physics step. Simply do something like this:
world.on("postStep",function(evt){

  wheelBodyA.angularForce += 30;

  wheelBodyB.angularForce += 30;

});Play around with the JSFiddle to see the full code. See if you can add some more cool stuff to the vehicle!
Please leave a comment, star p2.js on Github, tweet or if you think this tutorial is useful!
I made this game together with and at Goo.
![]()
It’s a kill ’em all multiplayer game with support for up to 4 players. We used the Gamepad API directly, which means that it doesn’t work perfect in all browsers.
The game uses a new SpriteSystem that I made for Goo Create and the physics is from p2.js.
Here’s the Goo team playing the game when we first presented it. It was buggy but fun! It was the longest presentation of the day since we didn’t want to stop playing.

I made the tile graphics. Should probably start a career as a 2D pixel graphics artist!

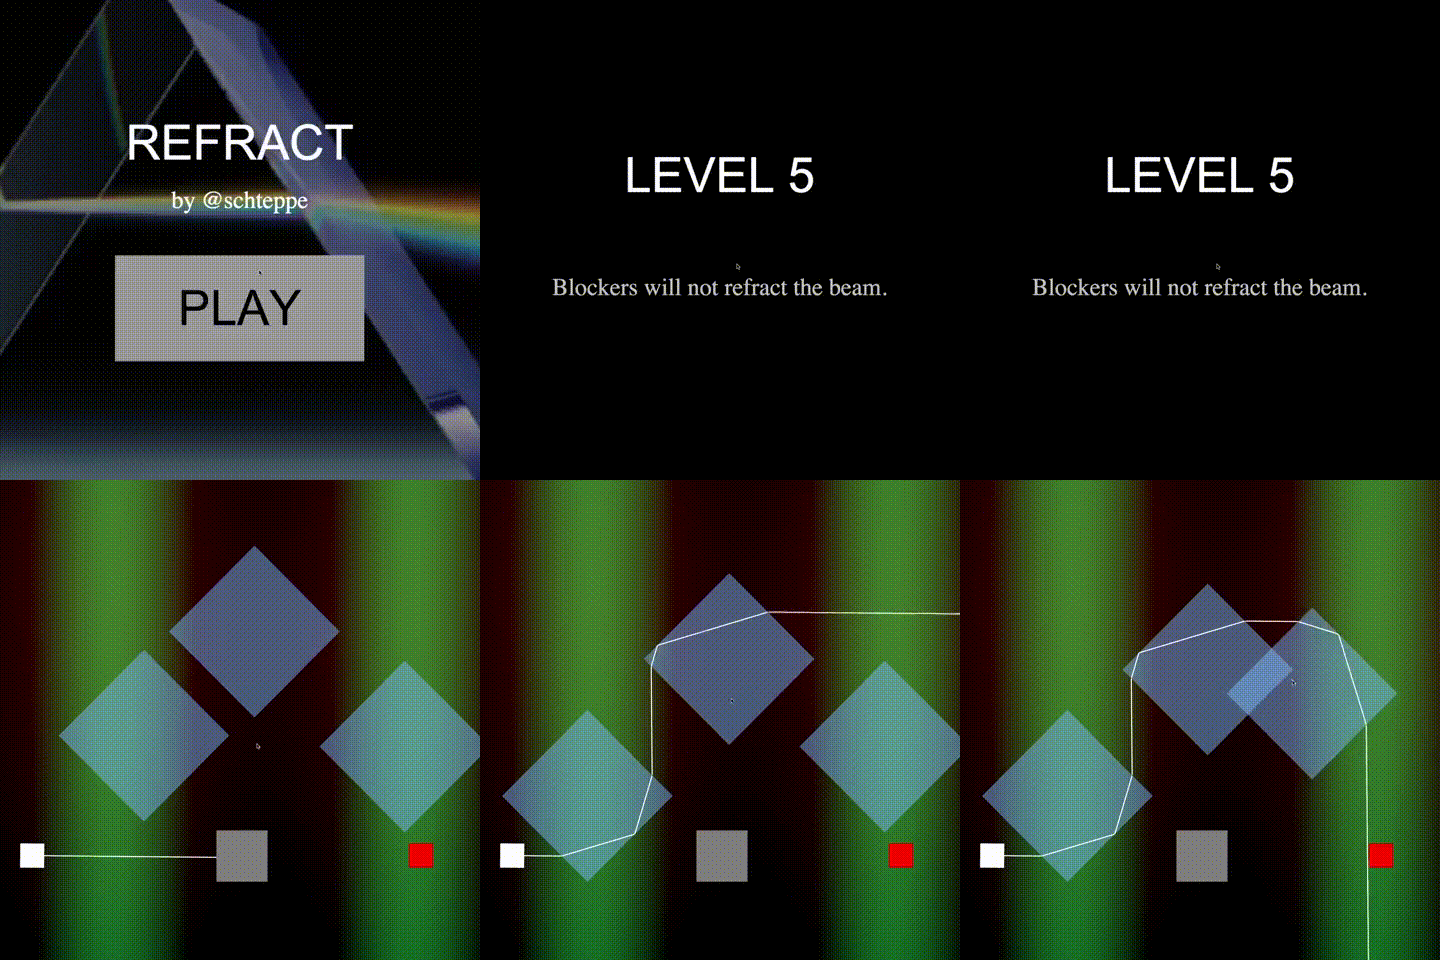
For Goofy day I made a WebGL game that I call Refract. The goal is to guide a laser beam from a starting point to goal. Its core mechanic is based on raycasting from p2.js – this is a perfect use case for the new p2 feature 🙂
The game was made entirely in Goo Create.
By flipping a boolean script parameter while working on the game in Create, it launches a custom level editor that lets you design levels and export them as JSON. The JSON can then saved back into Create to be included in the levels list.
The backgrounds are procedurally generated on the fly with some randomness added. I used texgen.js for this. I noticed that it uses a bit of CPU while generating large textures, so a future optimization would be to make a custom shader instead.
Because the game is very static when you don’t touch anything, it was possible to pause the render loop fully between interactions. This saves a lot of battery while on mobile.

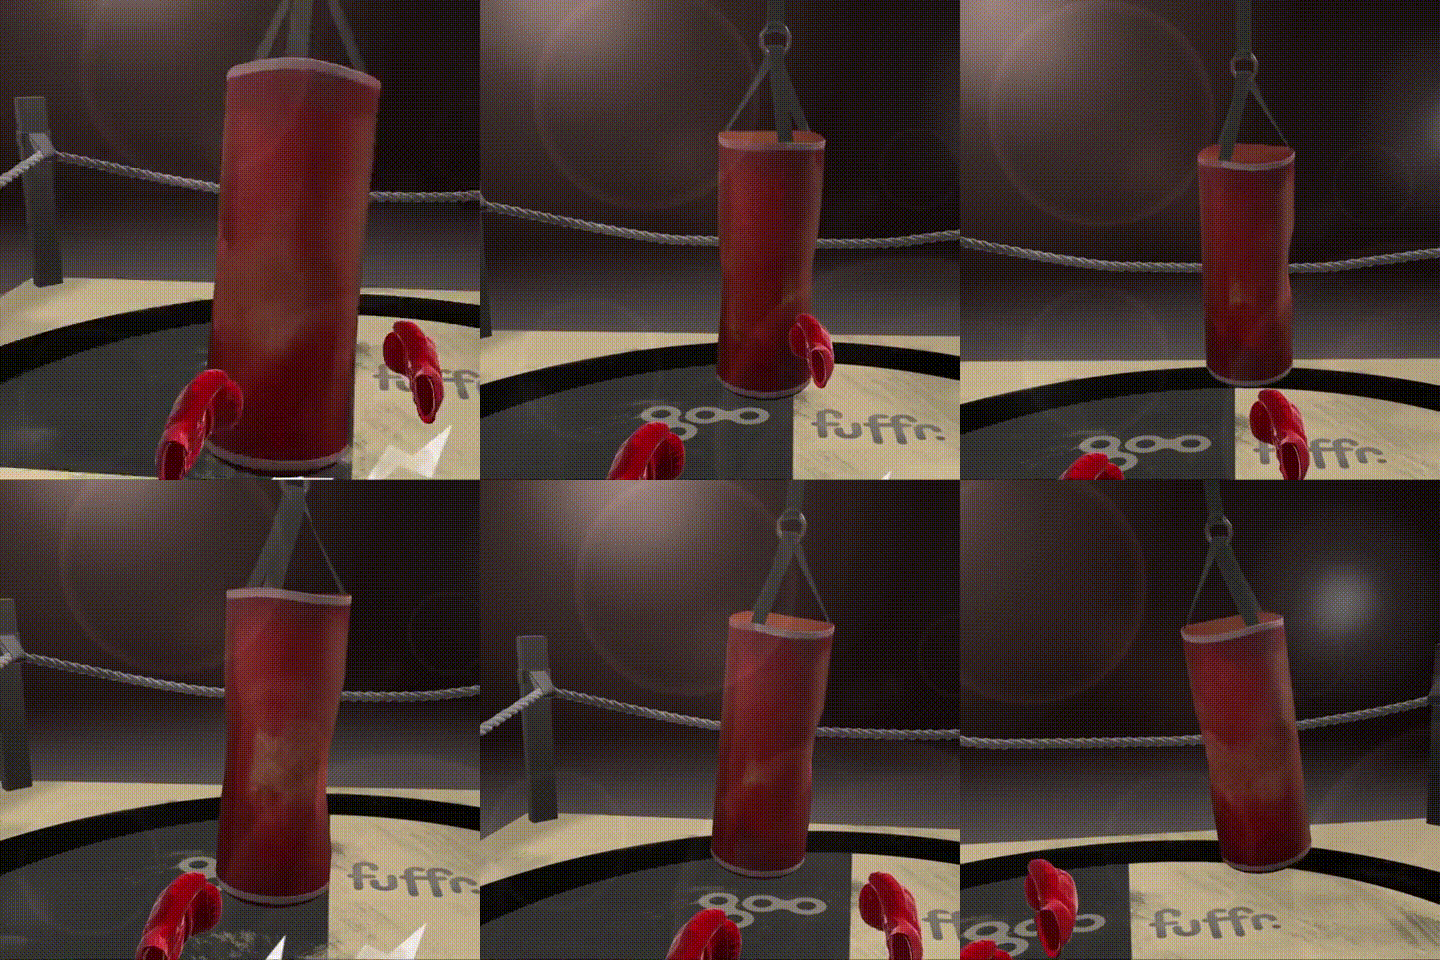
I made a WebGL demo for the Fuffr hardware. It’s a simple boxing game featuring awesome graphics made by at Goo, and the new physics components in Goo Create.

The most challenging part about this was to integrate it well with the hardware. Most of the tech part was already sorted – there’s a Fuffr JavaScript lib and a server app. The API is almost exactly like the HTML5 touch API. Easy to get started in other words.
Start Fuffr 3D boxing (also works on ordinary touch screens).
I was part of making the Suisse Mania project, making a WebGL site for Migros. It’s an experience for all ages about Switzerland and it features 54 attractions around the country.
The app had three versions, a 3D, a lightweight 3D, and a 2D fallback for older devices/browsers. The 2D and the on-top UI was made by Agigen, another techy company here in Stockholm.
The role I had in this project was to do most of the 3D coding. We used Goo Create (of course), and I had a bunch of graphics guys from all of the involved companies to help me do the scene beautiful. Since the UI layer of the app had all the state, it made development of the 3D app quite simple.
Another thing that I didn’t make but is still very cool is the splatmap shader for the terrain. It uses different channels in a “splatmap” texture to blend other textures in a layered manner. The result is higher quality texturing. The alternative is rendering a very high res texture for the whole terrain, but that would not work on all devices.
Without splatmap shader:

With splatmap shader:

Distance models for sound are used to lower the volume of a sound as its distance from the listener moves from it. I discovered that one of the models in the Audio API, the linear model, was broken in most browsers. But the inverse model worked well enough. The problem was to find good parameters to make sounds die out in the distance but around 100% volume when the camera is near the sound source. I used a graph calculator to get the right parameters for both linear, inverse, and exponential models.

I’m very happy with the result we got. It was hard work, misunderstandings, mistakes and all that, but it was worth it. I met a lot of nice people and had a really good time working with the Goo and the Agigen team.

Retweet this:
Our latest project: a 3D map of Switzerland in . Explore it at
— Goo Technologies (@GooTechnologies)
I’ll just admit it – I hate writing CSS. Therefore, I baked Twitter Bootstrap into PhysicsToy. The result is prettier and gives more of a tool feeling.
At the same time I shuffled around the menus. Before, all menus were stacked in a hierarchy and it became hard to use. The new version has a context based left menu box, and it is far superior to a hierarchy.
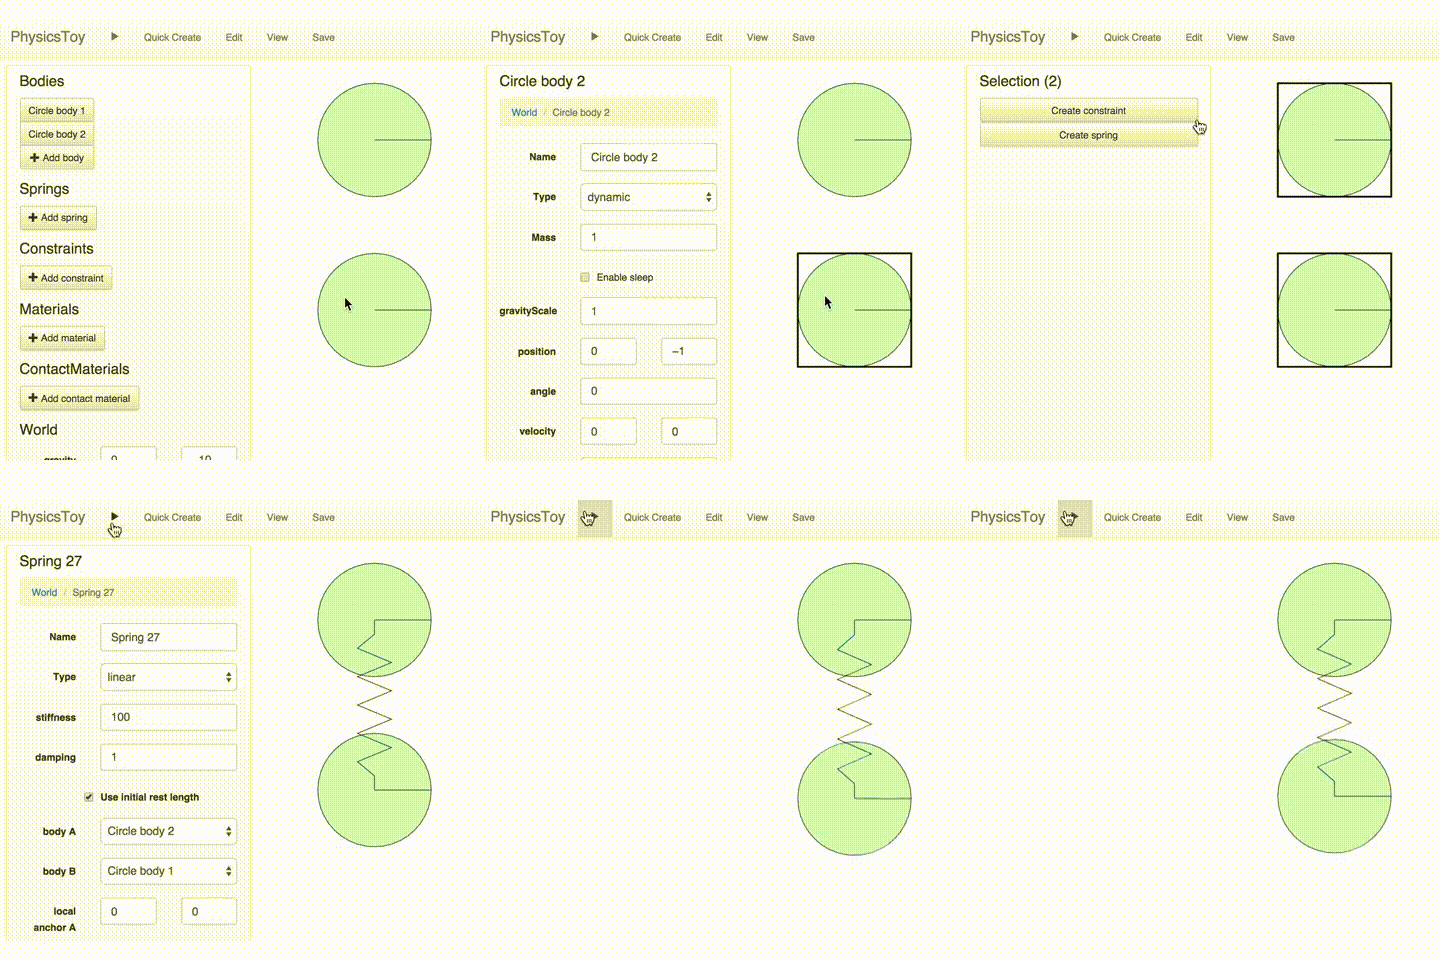
To get the context menu working, I put some work into the selection system. When clicking on the WebGL canvas, the coordinates are converted to physics space, then I do an overlap test to check if something in the physics world was hit. If this is the case, it’s reported to the outer angular app, which adds the item to a selection list. It will update the context menu accordingly, and tell the WebGL renderer to draw borders on the selected items.
If two bodies are selected, the context menu shows buttons for adding a constraint or a spring. This is much more useful than creating a spring and then go through two body lists to find the connected bodies.

Mouse dragging does not work yet – however arrow key moving works. Even if several bodies are selected.
I also added duplication – useful if you need to create many similar bodies.

All of these new features speeds up the workflow in PhysicsToy. Go create something.
Been thinking of releasing a game on Google Play for a while and I finally did it! I made the game in Goo Create during the last goofy friday and released it as an app the day after.
The game is called Tap Truck and the goal is to drive a monster truck to the finish line without tipping over.

And now the tech part. I exported the project from Create as a webpage. Slightly modified it and uploaded it to Ludei online compiler. I got an .apk file back which I could sign and upload to Google Play.
Should make a tutorial for this. Let me know if you’d like that!
I found myself showing Vines when trying to elevator pitch myself. Mini videos are great for show the gist of a product. Therefore, I compiled most of my recent Vines to gif and collected them here.
I recently got a few questions on how I make and upload my screencaps to Vine. Here’s the recipe!
QuickTime on OSX has support for video screencaps. Open QuickTime and go to File / New screencap. Pick a part of your screen and press record. Make sure that your screen selection is nearly square for the best vine experience! Also, make sure that width >= height, otherwise Vine won’t accept it.
To get an almost square selection, I resize my browser window with Chrome devtools open until I see that the inner browser width equals the inner height. Then I make the screen selection for the video.
It’s easy to trim the video in QuickTime. Just press command+t and you can use the UI to trim your video. Make sure that the total time of the video is less than 6.5 seconds.
Usually it’s okay to export in 1080p, but make sure that you don’t pass the max file size of 5Mb. Click File / Export / 1080p… and see what you get.
Note that if you choose to remove the sound from the video (see next step), the file size will be very small.
Sometimes sound is not needed in the Vine. I use ffmpeg with the following command to lower the volume to zero:
ffmpeg -i in.mov -af 'volume=0' -strict -2 out.movYou can upload the Vine using the VineClient add-on for Google Chrome. Install, log in, press Upload and follow the instructions.
Note that if you check the “Keep aspect ratio” checkbox, you’ll get black stripes at top and bottom of your Vine. Uncheck it if you know that your video is nearly square.
Don’t make the mistake of sharing to Twitter via VineClient. In that case your Vine will not get displayed inside your tweet. The reason for that is because VineClient uses an own Vine URL that Twitter doesn’t recognize. Instead, go to , find your Vine there and share it.
Note that the Vine URL in the tweet got hidden! This only happens if you put the URL last in your tweet.
That’s all! Now go make some awesome Vines.